How to deploy Bridgetown to Digital Ocean
Deploying a Bridgetown static site to Digital Oceans app platform is fairly straightforward, but does require knowing the right buttons to push and the correct commands to execute. This guide teaches you exactly that.
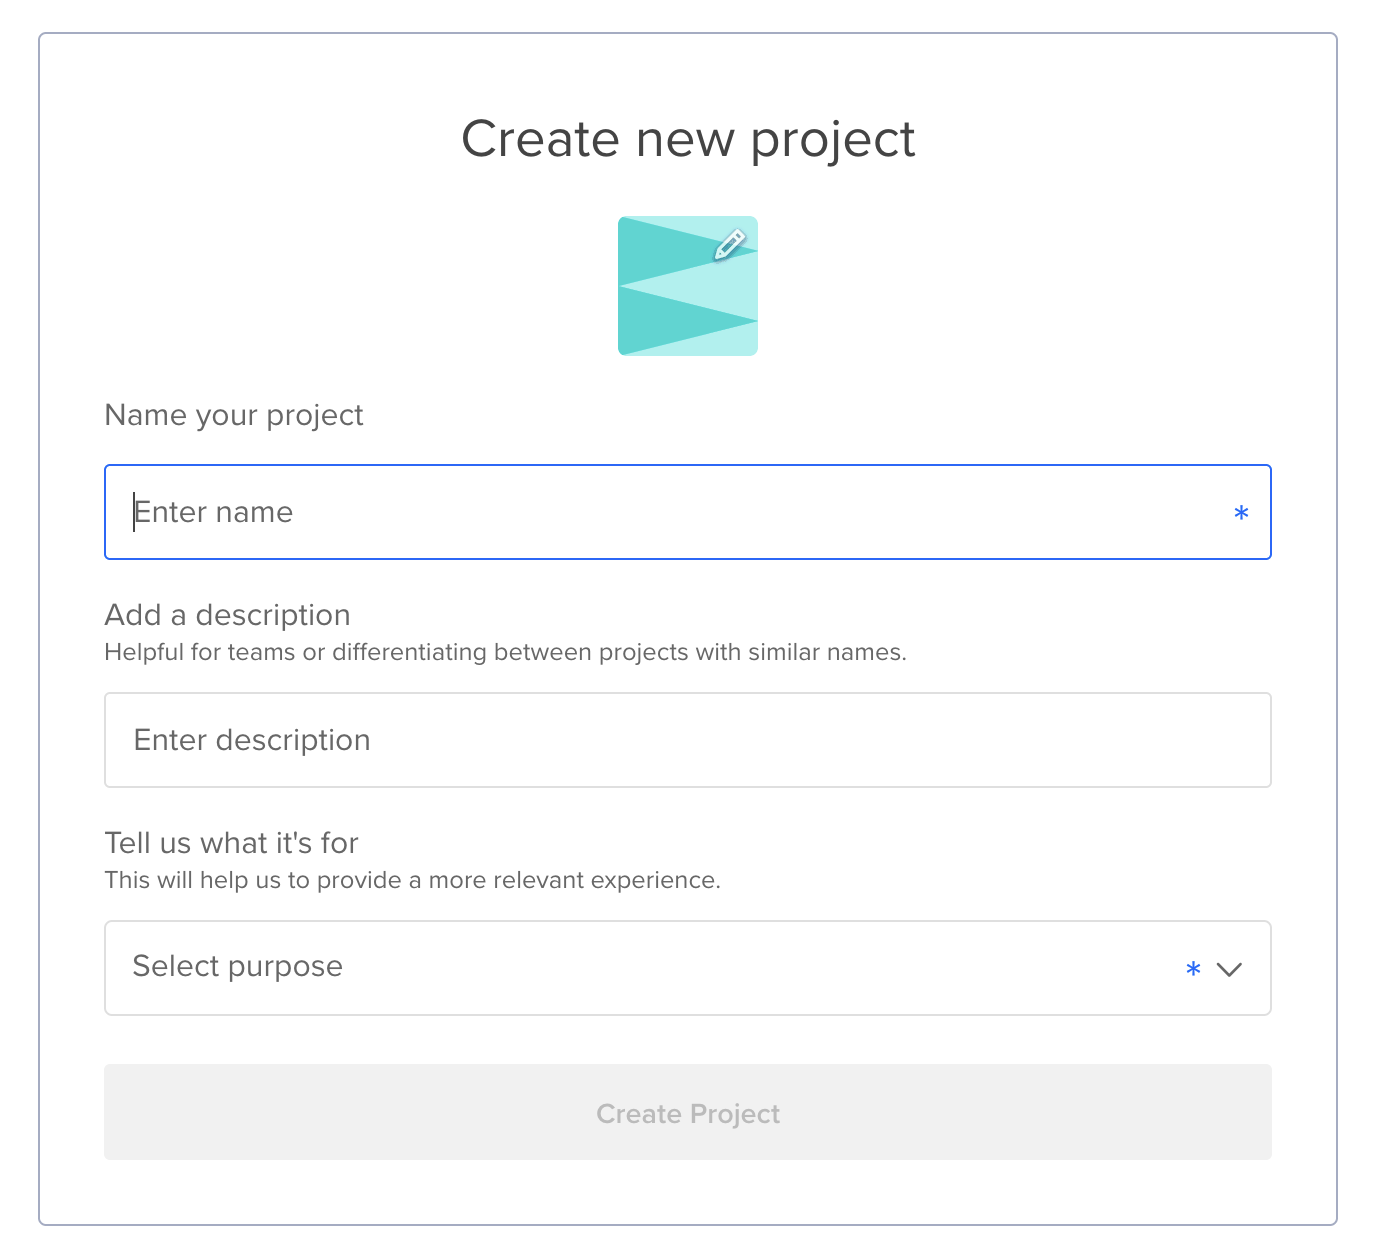
1. Start a “New Project”
If you don’t already have a project for your static site, you want to add one. Click the “+ New project” link in the sidebar and fill out the details:
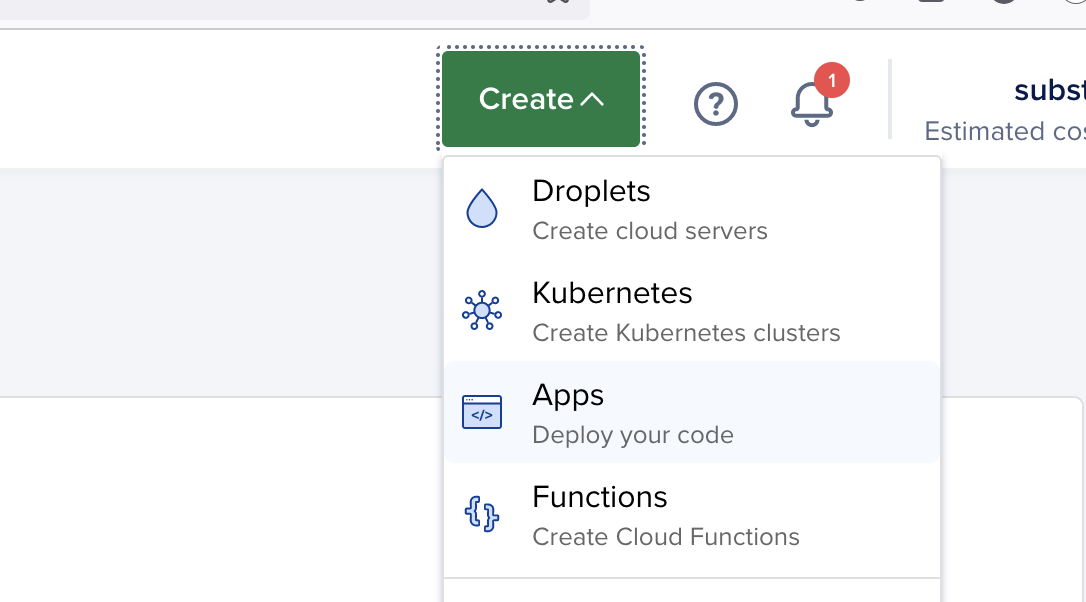
Add a new app to your project
Projects are collection of different resources, one of which is an “app”. Click the green “Create” button at the top right to add a new app and select “Apps”:
At this point Digital Ocean expects you to have pushed your project repository somewhere, so you need to grant Digital Ocean access to wherever you have your repository.
When Digital Ocean has been granted access to your repository, it’ll show a branch and source directory to use. You’ll likely want to use the defaults, so just click Next.
After having done that, Digital Ocean imports your project and attempts to guess what it is and how to deploy it.
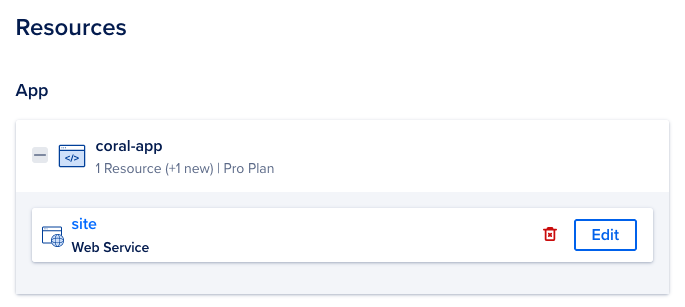
Edit site settings
Next up, click the “Edit” button next to the “Web Service” resource that Digital Ocean has suggested.
On the settings screen you’re free to change the name of your static site as you like, but we also need to make a few changes.
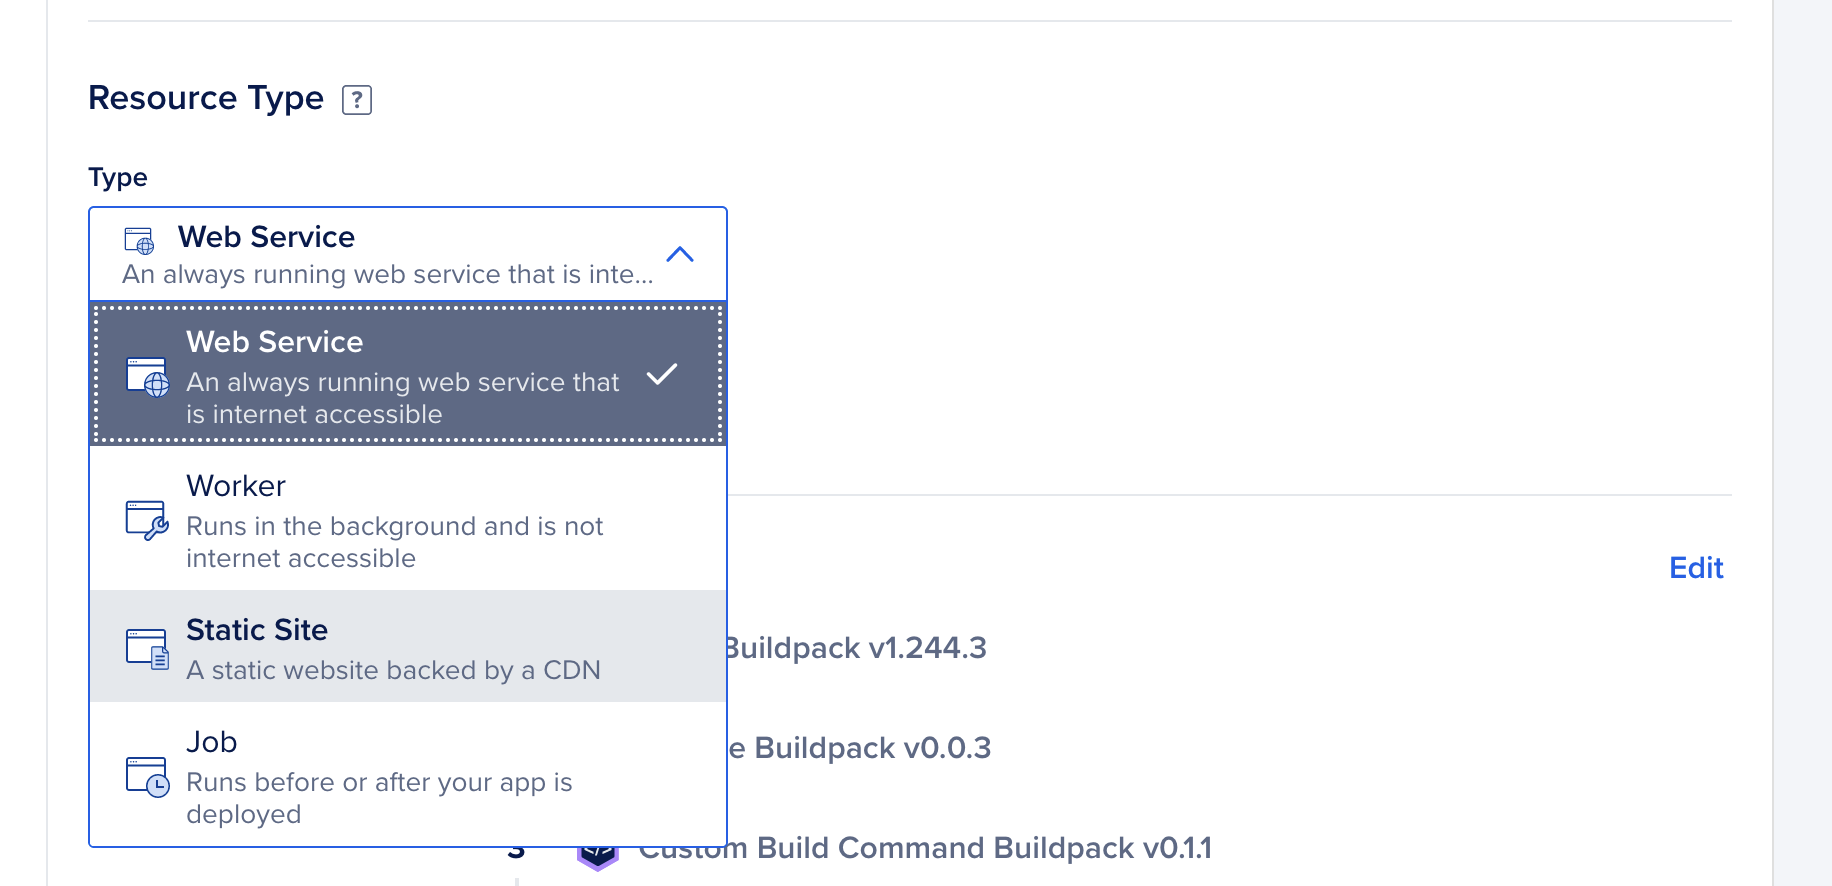
Configure a static site
Digital Ocean will guess that Ruby projects need to run as a full web service, but we only need a “static site” resource. So we want to change “Resource type” from “Web service” to “Static Site”:
Configure your build command
We also need to tell Digital Ocean how to build your Bridgetown project into a proper static site that it can serve.
By default, Digital Ocean detects that you’re running Ruby and runs bundler for you. It does not, however, run yarn to install your Javascript dependencies, so we need to tell it to do that. We also need to Build our bridgetown site in production mode.
Click “Edit” next to “Build Phase” and enter your “Build Command”:
yarn install
BRIDGETOWN_ENV=production bridgetown deploy
If you have more complex build requirements, you want to add them here.
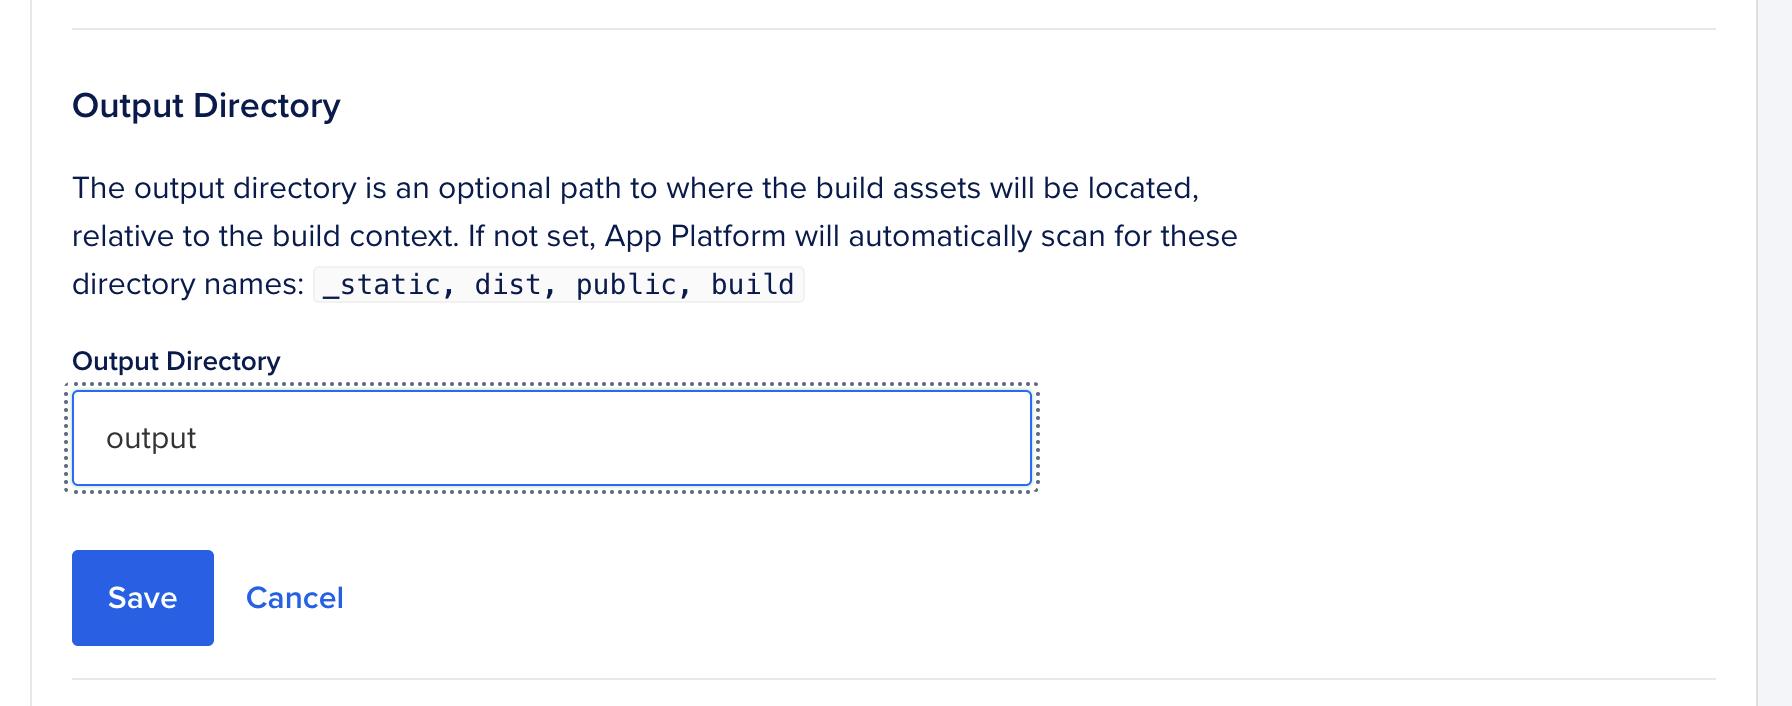
Configure the output directory
Change the Output directory to where Bridgetown generates your site. Bridgetown defaults to “output” so that’s probably want you want as well:
Now click the “< Back” button at the bottom of the Settings screen.
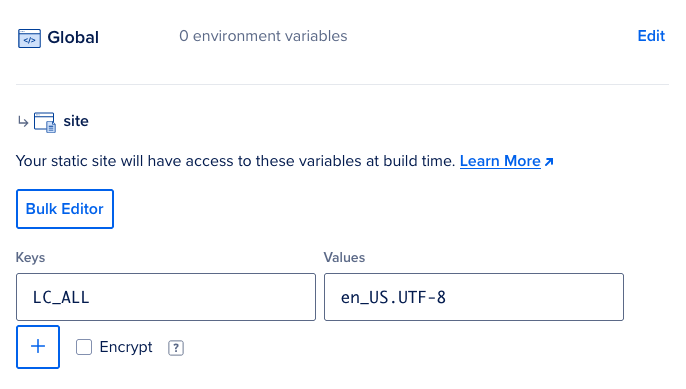
Ensure encodings work
If your pages contain non ASCII characters, like emojis or regional characters, you want to configure the application to use a UTF-8 locale. If you aren’t sure if you need this, you do, or you risk running into weird Encoding::InvalidByteSequenceError while building your site.
Click “Next” on the Resources screen to go the Environment configuration. Add an add an environment variable for your static site resource telling the platform what locale to use by default:
LC_ALL=en_US.UTF-8
When done, click “Next” a couple of times to finalize the setup (You might want to change some of the details to your liking on the Info screen, though).
Let’s get building
At the end, click the big blue “Create Resources” button and Digital Ocean will create your application and start building your site.

When it’s all done, your site should be live and available at the Digital Ocean-provided URL. 🥳